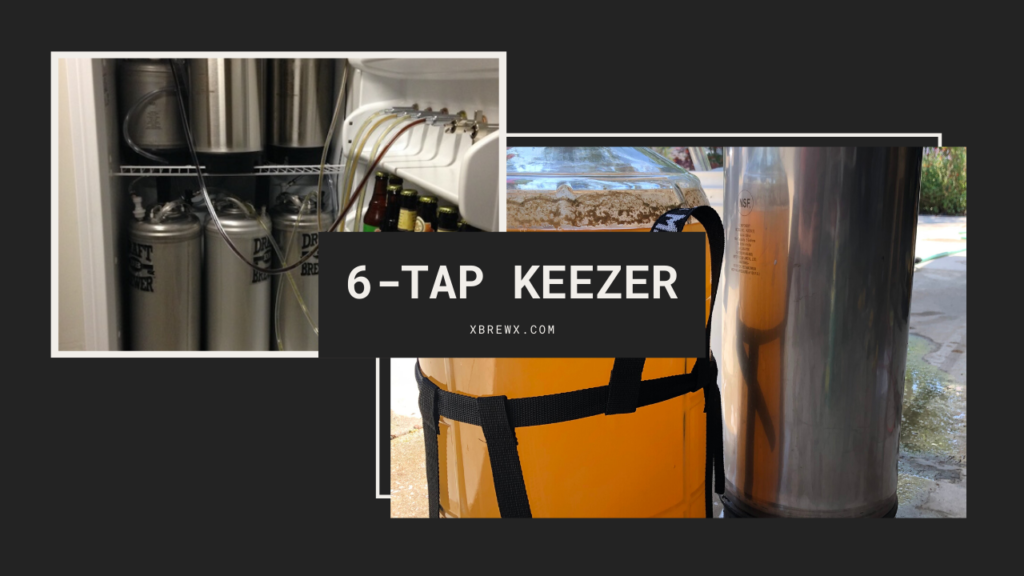
I know a lot of the DIY posts of how to build your own keezer involve things like welding, sawing, and general planning. However, I'm not really a DIY guy, so I wanted to do something a bit easier.
I started out with just 3 taps, but as I brewed more, I realized I had more room in the freezer, and basically filled it with as much as I could. It's now a 6 tap system. Maybe this style of DIY fit your skill level and if you want to keg your own beer but are not satisfied with a dinky 1-tap system, you can do something similar to me.
*by the way, I found out the “keezer” is basically a freezer converted to hold kegs. I kegerator is one of those small box units designed specifically to serve beer.
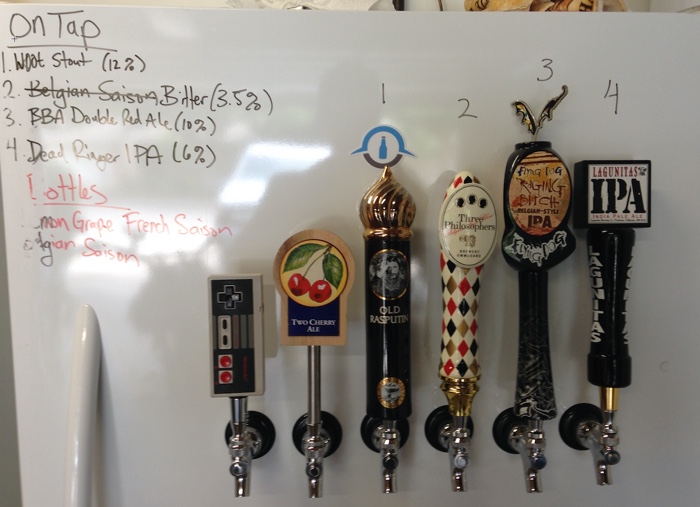
Keezer
- 16.6 cu. ft. frost free freezer (inner dimensions) 51.5h x 27w x 18d* (*depth is usable space. There's another few inches that allows the door to fully close with shelves in place)
- ThermoStar™ Dual-Mode Digital Temperature Controller (1)
Taps
- 3 or 4 inch beer shank (6)
- 3/16 tail piece + rubber washer (6)
- beer shank wing nut or hex nut (6)
- your choice of beer faucet (6)
- your choice of tap handle (6)
CO2 System
- 10lb CO2 tank
- CO2 regulator (I use Governor Double Body, explained below)
- gas connector kit (6)
- foam free tubing kit (6) *
- barbed swivel nut + worm clamp (2)
- extra gas tubing (connects distributor with CO2 regulator)
- 6 way gas distributor with MFL shutoffs
Other Stuff
- 5 gallon corny keg (3)
- 2.5 or 3 gallon corny keg (3)
- 2×4 construction (see below) for shelf support
*You can make your own beverage lines since you won't need the plastic faucet head in the kit ($4). It'll save you total $24. But it means you'll need to measure, cut, and construct your own lines, plus you'll have to clamp them with worm clamps instead of the nice-looking stepless clamp included in the kit. I just bought the kit and now I have a collection of plastic faucets in case I need them for a mobile keezer.
Starting Construction
Building the actual thing is easier than you think because you are essentially just drilling holes in your freezer. BTW, do NOT get the manual frost kind! Those have fixed shelves that you cannot remove, and will make it impossible to fit all your kegs in there.
Also, DO NOT DRILL HOLES IN THE SIDE OF YOUR FREEZER. I got lucky on this because I learned afterwards that the sides of the freezer is where all the gas is held that keeps the freezer cool. Permeating the side of your fridge or freezer could cut the gas lines, causing all your coolant to leak out, and render your freezer useless.
Once you have a place for your keezer, it's time to start drilling.
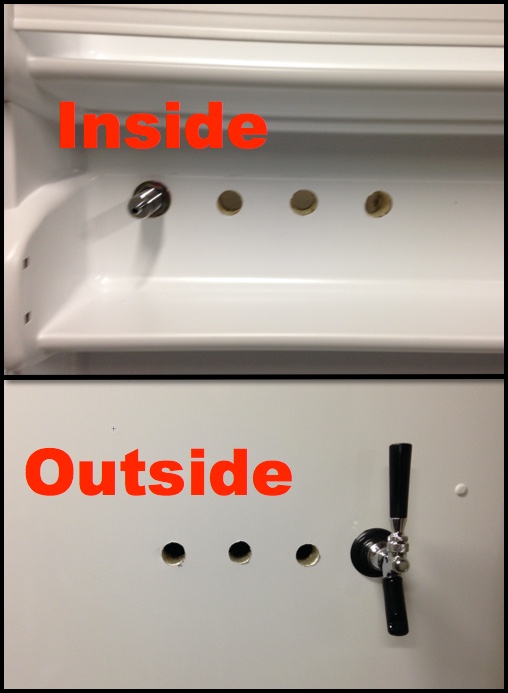
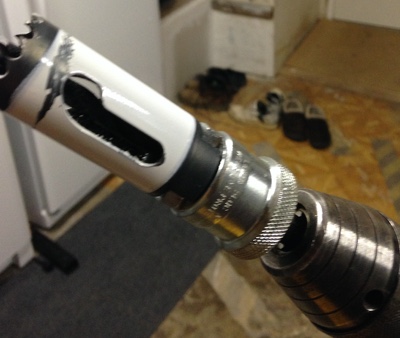
Yup. Just start drilling. I drilled starting on the inside and drilling out because I wanted to make sure I got as close to the edge of the shelf as possible to give myself more room to fit more tap handles. If you were more patient, I guess you could measure things out properly, but I just eyeballed it and got lucky. I used a 1-inch hole saw and battery powered drill as shown below.
Now you can start putting your shanks and faucets together. Originally, I bought a shank that came with the tailpiece already welded on there, but for some reason, they don't sell them anymore (or I can't find them). So for the last two, I had to buy the pieces separately as described in the equipment needed section above.
You can see the difference below. Perhaps the take-apart kind will be easier to clean. I chose wing nuts so I could easily take them off and on without a wrench, but I guess the hex-nut versions would look nicer.
I haven't run beverage lines through my new shanks yet, so am unsure if this is how the washer is supposed to fit. Will update when I find out.

Fitting Your Kegs And Lines Inside
Now it's really a matter of finding a place for everything to fit. You can see how I've got mine set up now for a general plan of what works. I have 3x 5 gallon kegs on the bottom, with 3x smaller kegs on top, along with the CO2 tank. Notice that I'm using the shelf that came with the freezer plus a 2×4 frame for extra support. It's plenty strong to hold all that stuff up.
I've drawn in red where I placed the support structure and how it was built. Each rectangle is a 2×4.
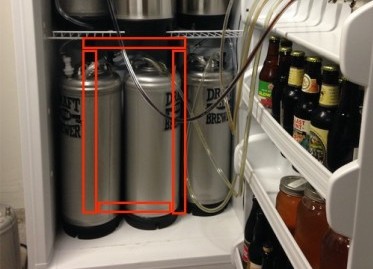
There was no special design, and I just measure it to sit directly below the rack already in place. Depending the freezer you get, this may or may not work for you. I still have plenty of clearance on the bottom and top shelf, so I imagine that shelf location won't vary too much from brand to brand. The rack is quite sturdy, plus the 2×4 structure I highly doubt that 8-9 gallons of beer plus the CO2 tank will be too much weight.
Along with fitting everything inside, you have to start connecting gas and beverage lines. To keep the 6 way distributor in place (and since I couldn't lock it to the side of the fridge like I wanted), I just clipped it to the shelf.
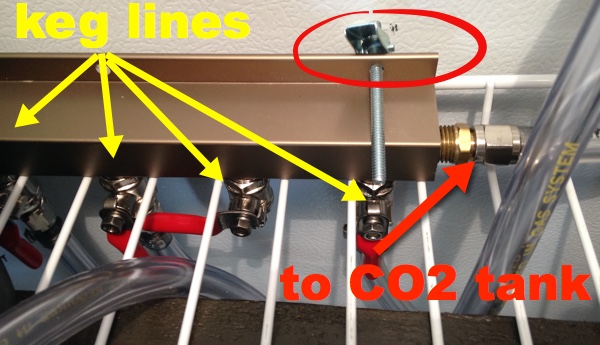
If that looks like a mess, think of it in simpler terms:
CO2 Tank ==> Co2 Regulator ==> Co2 Distributor ==> Kegs
Oh, and I haven't even talked about the regulator yet. I bought mine as part of a package that included two kegs, called the Draft Brewer Flex Keg system. It basically means I can use one tank to run two different pressures for serving.
I wanted this setup so I have have the typical 8-10PSI setup for normal ales and lagers, PLUS have an extra regulator if I want to serve another type of beer. Wheat beers and many Belgian style beers like saisons require a higher volumes of carbon dioxide (12-15 PSI), while English style beers and some high gravity beers like Russian imperial stouts may require lower volumes (~5 PSI).
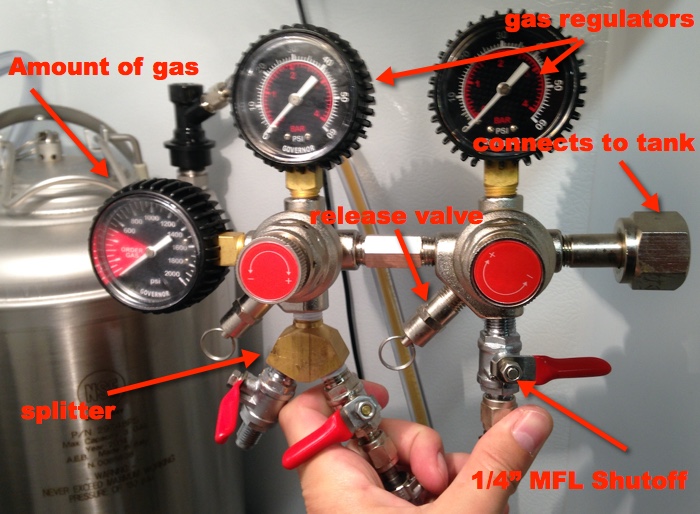
This kit included 2x MFL shutoff valves and, 2x 5 gallon kegs, and all necessary gear to serve from two kegs. I added a splitter to use with my Blichmann Beer Gun (review coming later), but the splitter is not necessary for serving, nor do I have room to fit a 7th or 8th keg.
You don't have to get the dual body regulator. You could get the Draft Brewer Twin Keg System (2 kegs, single body regulator) or the Draft Brewer Single Keg System (1 keg, single body regulator) depending on your needs. You can also buy the parts in pieces, as all regulators and kegs are sold separately. However, this 6 tap system was my first venture into kegging, so not only did I need everything, I was unsure about ordering separate parts and was happy to get it as part of a kit.
Note: I also purchased my CO2 tank online. I found out later that most shops do tank exchanges like propane. Make sure you have a local supplier that will fill CO2, because not all welding supply shops do this.
Personally, I like having a clean tank next to all my beer, but it's not necessary. I also liked this kit because it came with two brand new kegs without the rubber around the top, which can get in the way of the wrench when putting on/taking off the nut.
Getting The Damn Thing Working
Now that you've got all the parts, it's pretty simply. You just need to connect everything.
- One side of the swivel nuts connect to the MFL shutoff valves on the CO2 distributor.
- The other side of the swivel nuts connects to the ball lock gas disconnect
- The ball lock gas disconnect connects to the gas peg on your keg
- The ball lock liquid disconnect connects to the liquid peg on your keg
- The other end of your liquid line connects to the tail piece on your beer shank
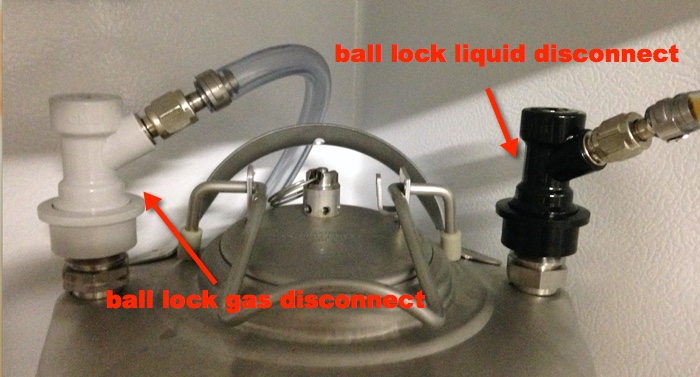
Note: If I was going to redo anything, I would get 1/4 MFL tailpieces instead of 3/16 barbed and add another barbed swivel nut to the end of the liquid line where we removed the foam free serving piece. It would make connecting and removing the liquid line from the shank much easier.
Now that you are all connected up, it's time to let your beer sit on with the CO2 connected at your desired PSI (depends on fridge temp and beer style). If you haven't got any beer in there yet, then it's time to kegging your homebrew!
Temperature Control
Temp control for the unit is easy. I purchased the Thermostar Dual Mode Digital Controller because it did not require any wiring as many controllers do! There are several on the market that also do not require wiring, but they are hard to find anywhere in stock.
All you need to do is plug in the freezer to the Thermostar unit, then plug the unit into the electrical socket. It comes with a temperature probe which you can just stick between the door and hang inside the freezer on the rack or like I did – which was to find some sticky hooks (for haning pictures, etc) and stick them on the inside of the freezer.
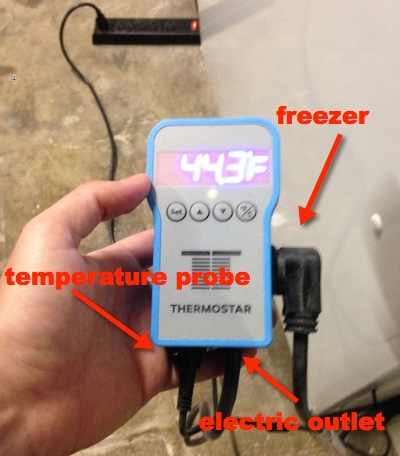
The only issue I ran into was finding a place for the Thermostar. It comes with a suction cup but that doesn't work in the slightest. Since I can't drill a hole on the side of my freezer, I had to just set it on a nearby shelf which works, but is not an elegant solution. Perhaps you can think of something better.
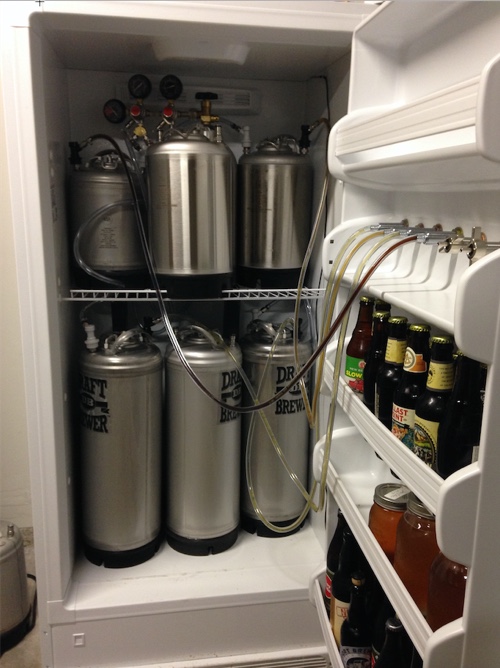
The finished unit holds 3 five gallon kegs and 3 three gallon kegs. In the photo below you can see that it's pretty full, but the door closes fine. I could potentially fit another 2.5 gallon keg in there but it would be a tight fit.
Holy! This is every guy’s dream!
Well done, Nate! Looks great and I am sure tastes amazing 🙂
Still lovin’ it to this day. Although I have a CO2 leak now and can’t figure out where it is. Already drained two tanks 🙁
Hi Nathan!
I had to share this with my husband. He is a beer lover! He has customers who make their own beer, so he may decide to try to brew some for himself. 🙂
~ Melinda
Wonderful job Nate.
Like you, I have a gas line issue somewhere and am contemplating whether to just pull it all and redo (hose and fittings aren’t that expensive, or have one of our local home brew supply shops take a look.
Having so many small nano breweries close by and many catering to a very diverse Seattle/regional audience, getting almost anything filled is a snap requiring just a tad of coordination.
Nice job partner, I am so impressed. Had a link to this site on my desktop but hadn’t clicked on it for a while. Looking at all those lines going everywhere and talking about distributors and regulators… oh man, just give me a beer, ey?
Awesome site Nathaniell,
Randy