Every beer falls into one of two categories, lager or ale, and the fundamental difference is the type of yeast used and its temperature during the fermentation process. Making a lager isn't easy, but it's not that hard either, and there are a variety of ways to create amazing homebrewed lagers.
Homebrewing is an ancient science. A stroll through a modern-day brewery makes it apparent the process of making beer evolved alongside humanity’s mastery of chemistry and mass production. Yet, homebrewing allows us to take a similar journey our ancestors took to brewing perfection.
The homebrewing journey often begins with a small batch of ale made from a kit. Ales are faster and easier to produce, and if you screw 'em up, they still taste pretty damn good.
Lagers are a bit of a different story.
Lagers are more finicky. Many lagers are light lagers, meaning there are not a lot of hops and specialty grains to mask your mistakes. An improperly brewed ale is still pretty good. An improperly brewed pilsener or golden lager might end up in the drain (I've done this).
Adding lager to your repertoire will put you on the path of becoming a more accomplished homebrewer, but for most, this means adding some equipment to their homebrewing operation. Before we get into some of the specific equipment needed to brew lager, let’s delve a little deeper into how lager is made.
As we mentioned before, the difference in brewing ale and lager is the strains of yeast used to ferment the beer.
Ale is made with top-fermenting yeast that works best around the target temperature of 68 degrees Fahrenheit. The ability to ferment ale in warm conditions made it the most common kind of beer before the advent of refrigeration.
Part of what makes an ale so hardy is that really, you can ferment at a range of 62º – 75º and still get a pretty good beer. This is generally room, closet, or garage temperature year round. A warmer temperature will produce more “fruity esters”, and a cooler temperature may take longer to ferment out, but it still works.
Lager is made with bottom-fermenting yeast with an optimal temperature range of roughly 41 to 52 degrees Fahrenheit. Lager is known to have been brewed as far back as the middle ages.
Bavarian brewers realized fermenting beer inside frigid caverns slowed the fermentation process and produced a clean, crisp beer with a smooth finish. Once modern refrigeration became widely available the popularity of lagers quickly overtook that of ales.
The key to making good lager is fermenting it at a low temperature and then letting it mature in those frigid conditions. This is the main challenge in creating lagers – temperature control. Here is broad range of lager temperatures, in order of steps required:
- Primary Fermentation: 45º – 55º (2-3 weeks)
- Diacetyl Rest: 60º – 70º (2-3 days)
- Lager: 32º – 40º (1-6 months, depending on style)
Assuming you have a kit in mind you want to make, or already have the grain/extract and equipment needed to brew your lager beer, let's take a look at some options you have to lager you homebrew.
There are multiple ways to drop the temperature of your homebrew for the fermenting and maturation process of making lager. These methods vary in cost, hassle, complexity, and accuracy.
Table of Contents
What To Consider When Lagering Your Homebrew
Cost
For those on a budget, simply using your garage in the winter is an option or a sustained ice bath can do the trick. Some homebrewers even utilize portable air conditioning units to cool down their fermenting lager.
There is a vast difference in cost between low-end and high-end temperature control systems, but the good news is there are many price levels in between.
Hassle and Complexity
The sheer number of brewing options for lager can be overwhelming but your specific homebrewing operation will be the best guide to picking the right option for you.
If you already own a standalone freezer there are temperature regulators available. Those short on space and want something they can store might opt for a kit to convert their carboy into a temperature-controlled fermenter.
If money is no object, there are systems capable of brewing lagers that rival craft breweries but can take a bit of know-how to set up and operate
Generally, the more do-it-yourself your temperature control system, generally the bigger the hassle. Although some see it as a labor of love, many opt for equipment that is specifically designed for homebrewing lager.
Accuracy
Unfortunately, most homebrewers don’t have access to a deep cavern like the ones Bavarian brewers utilized to slow down beer’s fermentation process in the middle ages.
However, we do have a lot more options to choose from and some of the options we have can hold a precise temperature for as long as you like. These high-end pieces of modern homebrew equipment are enough to make even a cave brewing Bavarian jealous.
8 Lagering Methods For Homebrewers
Pick Your Yeast Wisely!
This is the cheat. Some say, “if you aren’t cheating you aren’t trying”. What you can actually do is use a clean ale yeast or a hybrid yeast to brew an ale with lager qualities…those qualities being clean, smooth, crisp, and lacking in yeast-derived character.
While some homebrewers might consider using these ale yeasts cheating, they do allow you to brew lager style beer without putting in the time (and often, money) to brew a true lager. This option ranks at the top of cost-effective and hassle-free options, but the accuracy is up for debate!
Just make sure to ferment them cool and slow. Use finings, and leave time for yeast and sediment to drop out so you can get that crystal-clear look as well.
What yeasts could do this?
- California Ale (WLP001 / Wyeast 1056)
- San Francisco / California Lager (WLP810 / 2112)
- German Kölsch (WLP 029 / Wyeast 2565)
- Nottingham (Lallemand)
If you've ever had a kölsch style beer, or a really cleanly done cream ale, then you know that these can pass for a lager sometimes!
Pros and Cons of Using Ale Yeast
PRO: Will produce a great tasting “lager-style” beer if used correctly.
PRO: Does not require the special equipment brewing a lager requires.
PRO: It is a low-cost alternative.
PRO: Takes the same amount of time to homebrew as an ale (because it is an ale!)
CON: Still missing those true lager qualities that make them so crushable
CON: You still haven’t brewed a lager!
Inkbird ITC-308 Digital Temperature Controller 2-Stage Outlet Thermostat
This digital piece of equipment will turn your stand-alone or deep freezer into a lager homebrewing system for an amazing price. This unit can also be used to control the temperature of heating appliances as well as cooling appliances.
It includes a digital display for tracking current temperature while displaying the set temperature. This piece of temperature control equipment is jam-packed with features for its price.
Pros and Cons of Inkbird ITC-308 Digital Temperature Controller
PRO: This unit is much cheaper than other external temperature controls
PRO: It has a digital display and features an alarm system.
PRO: It can control the temperature of heating and cooling appliances.
PRO: This unit is “plug and play” with no appliance modifications required.
PRO: Upgraded model includes wifi control (everything is better with wifi)
CON: Prior ownership or purchase of freezer required.
CON: Plastic Construction may be less durable than other models.
CON: I own this one and the digital display broke on day 1
Johnson Controls A19AAT-2C Freezer Temperature Controller (D132)
Johnson Controls is one of the most trusted names in the electronic controls industry. Their products have a reputation for being reliable and durable. The Johnson Controls A19AAT-2C Freezer Temperature Controller can be used to turn your stand-alone or deep freezer into an adjustable homebrewing fermenter and storage system for lager beer.
This model is fitted with a simple, but reliable, mechanically controlled adjustment knob and control system. The unit has a stainless-steel casing and requires no modifications to your freezer.
They couldn't bother to upload a nice image to Amazon, so I have ‘t included an image here, but the reviews are solid.
Pros and Cons of A19AAT-2C Freezer Temperature Controller
PRO: A low-cost option compared to some of the high-end options.
PRO: Johnson Control is a trusted brand of professionals.
PRO: This unit is “plug and play” with no appliance modifications required.
PRO: All mechanical controls and stainless-steel casing are very durable.
CON: Prior ownership or purchase of freezer required.
CON: Lacks some of the features digital options provide.
CON: Only works with cooling appliances.
CON: More expensive than similar products due to brand name.
Kegco HBK309B-2 Keg Dispenser
Any frat boy worth his weight in cheap beer played a part in building or acquiring a homemade kegerator, but this isn’t a do-it-yourself column for college kids looking to party.
Instead, we present you with, ahem, a “grown-up” version, the Kegco HBK309B-2 Keg Dispenser. This kegerator is meant for serving beer, but it also doubles as a temperature-controlled fermenter and storage system for brewing lager.
The image above look small, but you can fit up to 3 5-gallon corny kegs in there.
The upside is when your lager is ready it can be served in style – on tap! Plus, the good news is that severing temperature for ales and lager temperatures are very similar – about 35-40 degrees F, so you can have an ale on tap while you lager.
The downside is that when you're fermenting and serving different types of beer, you may have to compromise on temperatures. Otherwise, you can just plan your beers out and do 3 lagers at a time, then 3 ales at a time. There are plenty of lesser-known styles of lager beers like Munich Helles, a variety of bock styles, baltic porter, rauchbier, schwarzbier, and biére de garde.
Pros and Cons of Kegco HBK309B-2 Keg Dispenser
PRO: It is an all in one temperature control system for brewing lager.
PRO: Fresh draft beer at home is awesome!
PRO: This unit can quickly be converted to a mini-fridge or wine cooler.
CON: It takes up a great deal of space and cannot be stored like other equipment.
CON: It is a high-cost item.
CON: It can only run at one temperature per unit.
Beer Cooler for 5G Keg & Corny Keg with Ice Sheet/Wrap by Cool Brewing
This product is a great option for small homebrewing operations that don’t want to invest a ton of money in a lager homebrewing system but still want to expand their homebrewing repertoire to lager.
It comes with its own custom ice sheet, with the option to include a second ice sheet. It might be a good idea to buy the extra ice sheet if you intend on using this product to brew lager. It also can be used as a keg cooler if you want to take your brew on the road.
Pros and Cons of Beer Cooler
PRO: It is a low-cost option compared to high-end lager homebrewing options.
PRO: Cooler can be used to transport beer in large containers for events.
PRO: Product can be easily stowed.
CON: Switching out ice packs can be time-consuming during homebrewing.
CON: It may not be as accurate as electronically controlled units.
BrewJacket Immersion Pro Fermentation Control System
This self-contained unit provides almost everything you need to homebrew lager, assuming you already have a basic homebrew operation. The cost of this unit is less expensive than premium options, but it does carry a decent size price tag.
This product has its own internal temperature monitoring system and is also a great option for homebrewers with limited space. The manufacturer’s website suggests purchasing a predrilled lid so it can be easily used with your existing fermenter.
NOTE: Do no sanitize with Starsan! Read the instructions for approved sanitizers.
Pros and Cons of BrewJacket Immersion Pro Fermentation Control System
PRO: The unit is self-contained and has its own internal temperature control.
PRO: It is easy to stow.
PRO: Takes up very little space (great for fermenting indoors)
CON: This product is more costly than basic options.
CON: It will only control the temperature for one fermenter
CON: May require you purchase another lid for your bucket (if you ferment in a bucket)
FTSs Temperature Control for Brew Bucket / Chilling + Heating
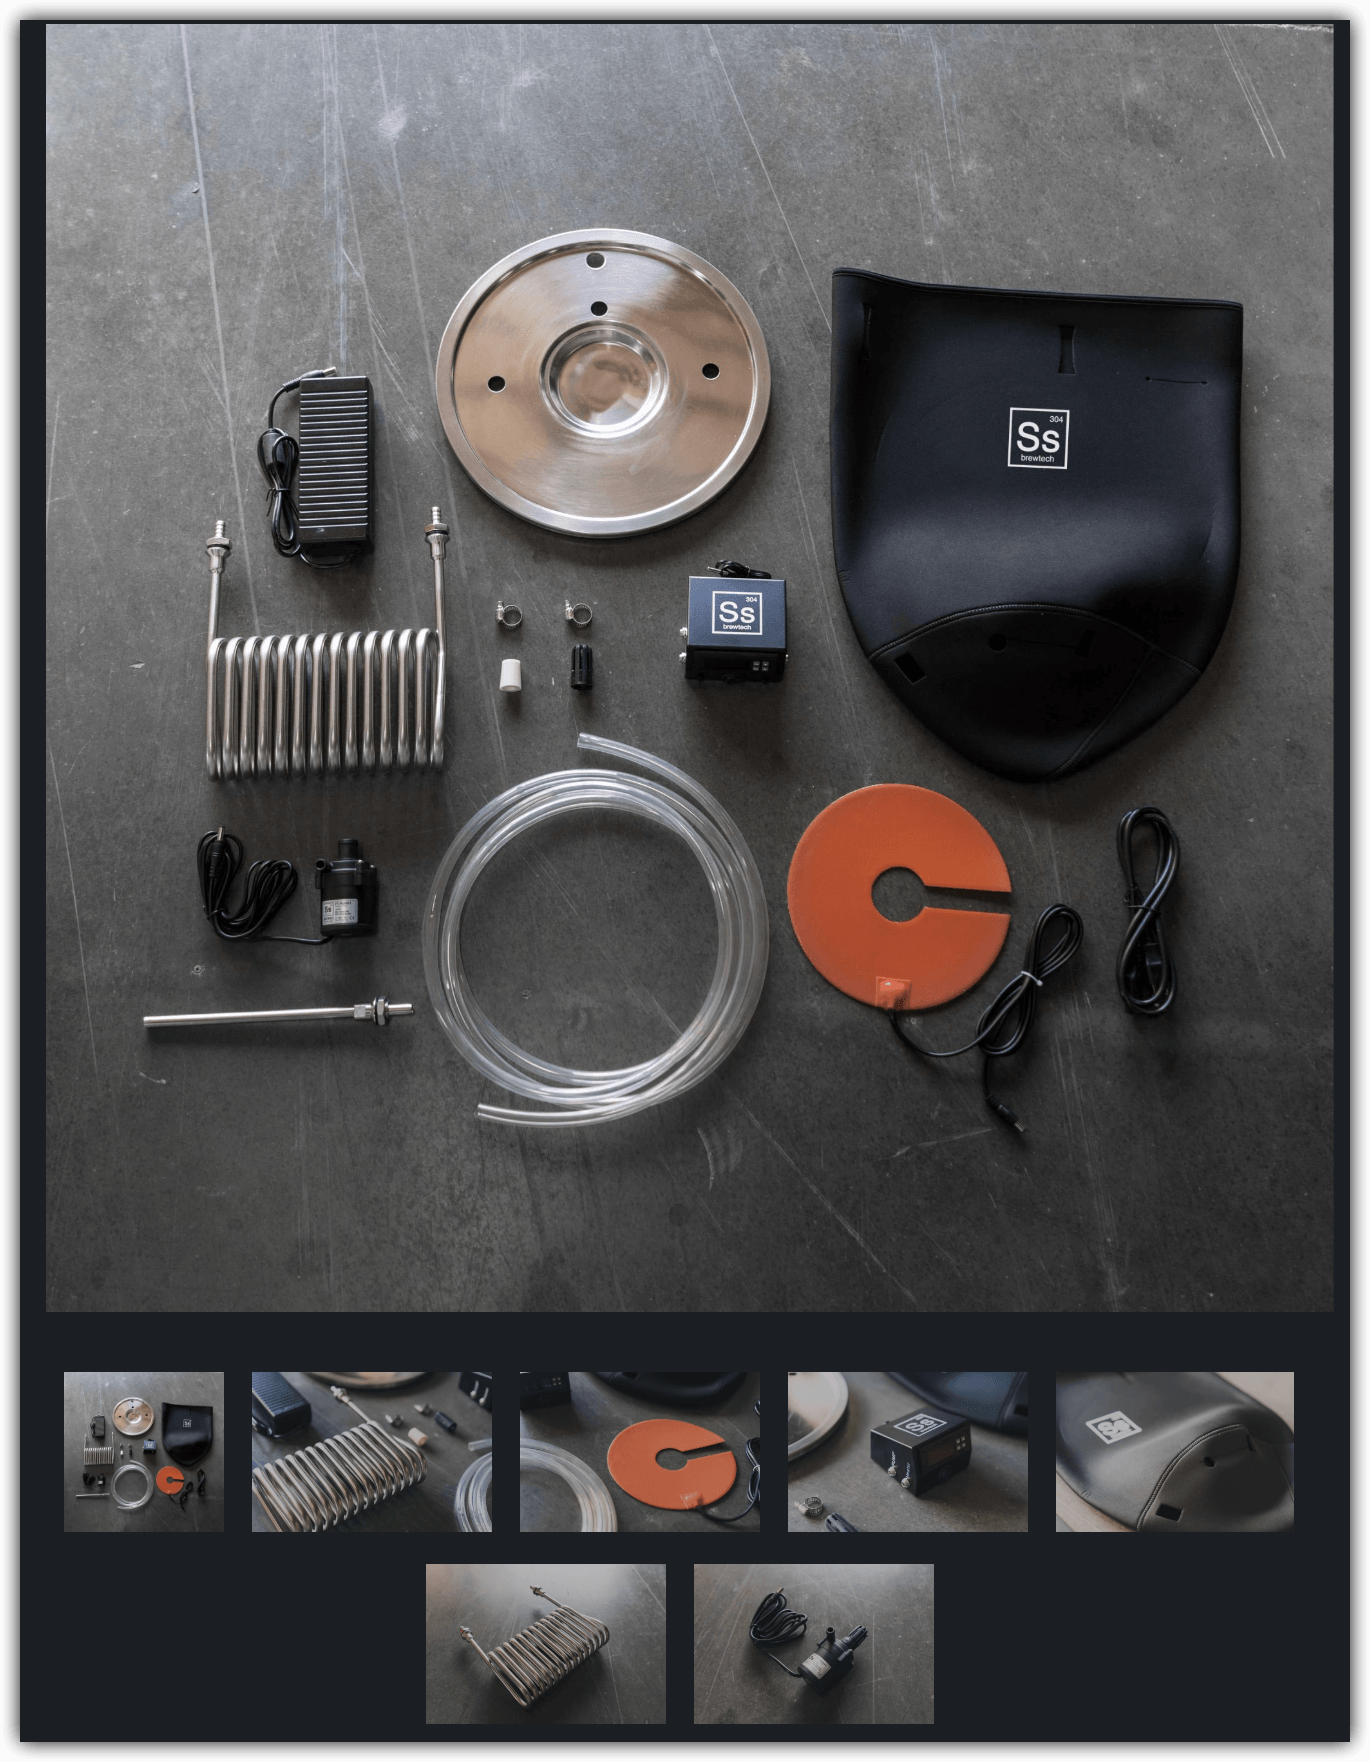
Those willing to spend a little extra money, but not willing to invest in pro equipment, will find equipment from Ss Brewtech to be extremely drool-worthy. The temperature control kit you see featured above is an addition to their Brew Bucket product (they also have a similar kit for their conical fermenter).
Gear from Ss Brewtech is going to be a high-end option for the recreational homebrewing of lager. You'll need either the Brew Bucket or Chronical (conical) to start. For small batch fermentation, brew bucket has a 3.5 gallon minimum size. For a 5 gallon batch, Brew bucket has a 7 gallon size, as does Chronical.
Side Note: Even if you brew just 5 gallons of beer, a 7 gallon fermenter is an OK size for a fermentation vessel because you may have extra trub, hop material, or other additions which will increase the volume of the fermenting beer, even though your final batch will be 5 gallons. Plus, you leave room for krausen during vigorous fermentations.
Then you need the temperature control kit to allow cooling liquid to flow through your beer. That's what the coil attachment is for, so the liquid can cool the center of your fermenter, not just the outside. Pump included!
But guess what. You're still missing something. You need a source of cold liquid! While the sales page says you can use ice water, let's be honest. You're going to want to get an official Glycol Chiller as well. You can use the glycol chiller to cool your beer more efficiently, and you won't have to change any ice water!
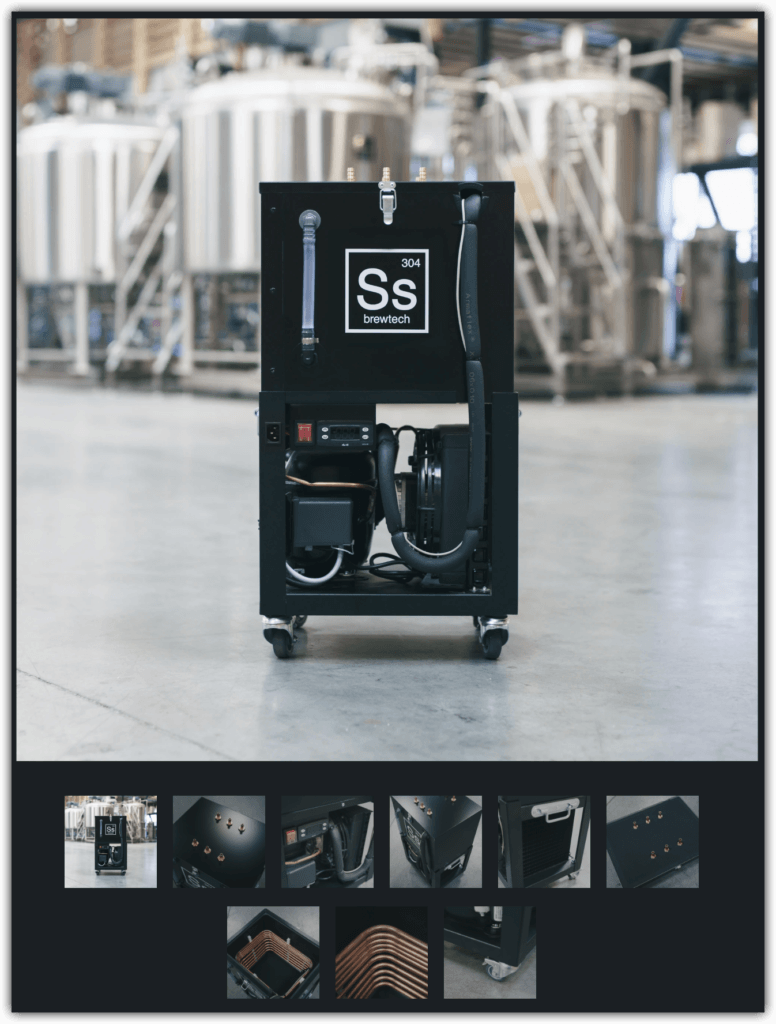
This device can actually cool up to three vessels, so you could be doing multiple lagers at one time. Of course, you'd need 3 separate lagering vessels, and three separate temperature control kits as well. T
However, for the homebrewer that can afford this (and many of you can), the professional look, workmanship, and the ability to heat or cool during the fermentation process makes this product well worth its hefty price tag.
Pros and Cons of FTSs Temperature Control for Brew Bucketa
PRO: It heats and cools.
PRO: A superior product to other recreational options.
PRO: The unit is well constructed and aesthetically pleasing
PRO: Can control multiple fermenters
CON: It is more expensive than most recreational options for homebrewing lager.
CON: The product only works with other BrewTech fermenters.
CON: It takes up a lot of space.
Grainfather Glycol Chiller with Cooler Connection Kit
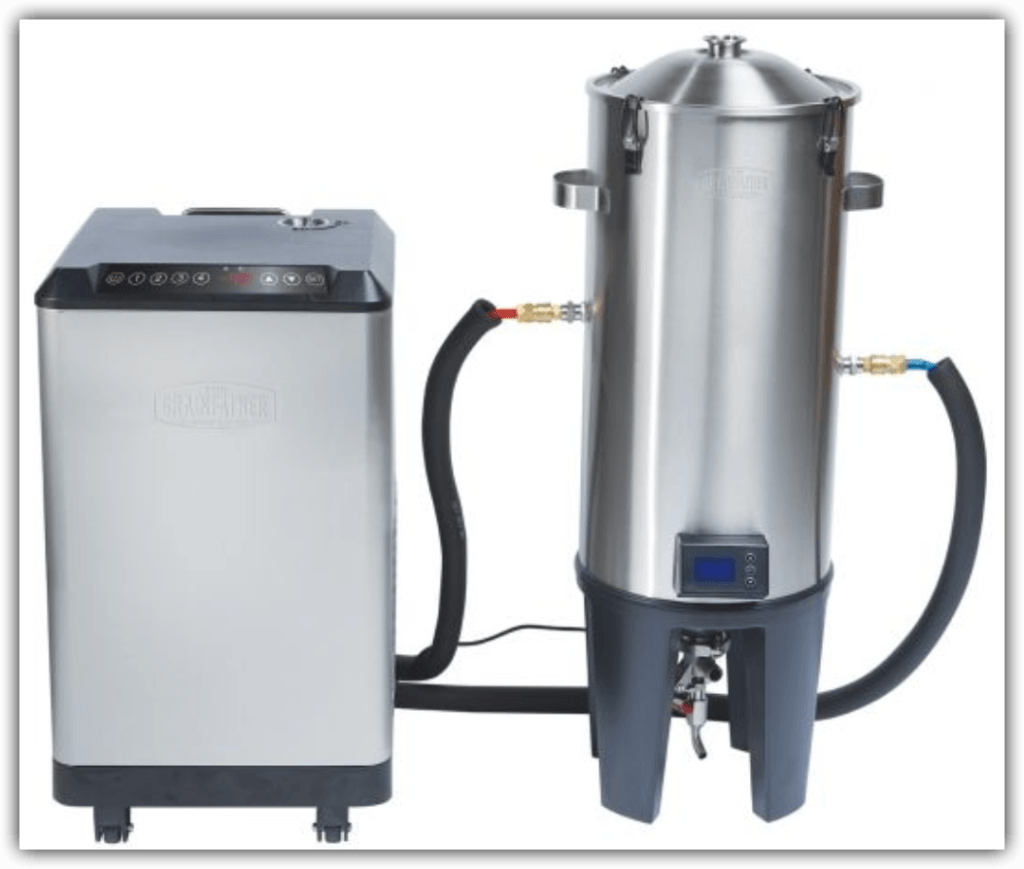
Glycol chillers are the big leagues for homebrewing operations. This is the closest you will get to brewing lager that tastes like it is from your favorite craft brewery! The unit has a 1.5 U.S. Gallon glycol tank and a digital display.
This product requires the purchase of other specialized equipment and may require a bit of research to properly operate depending on your level of experience. Namely, you need to buy a Grainfather brewing system.
Of course, this is is one of the all time, most well-known all-in-one brewing systems in the homebrewing community, so you'd be “forced” to buy this pretty sweet piece of equipment.
The Grainfather allows you to mash, boil, and ferment all in one vessel. With a glycol chiller, you can now lager your beer as well. Plus, with the heating and cooling attachments, you'll be able to get the precise temperature control you need to brew exactly to specifications.
With converted freezers, your fermentation temperature is never exactly what it says on the dial. you have to account for heat from yeast activity, variations in temperature from the outside of the carboy to the inside. It works, but it's not perfect.
Systems like this give you more precision and control.
Pros and Cons of Grainfather Glycol Chiller
PRO: It produces unparalleled results for the homebrewing of lager beers.
PRO: Grainfather is all-in-one mash, boil, ferment, and lager
PRO: Can control multiple Grainfather systems (up to 4)
CON: Very expensive compared to other options.
CON: Only work with the Grainfather brewing system
CON: Requires a lot of space
Homebrewing Lagers FAQ
Does lager take longer to brew lager than ale?
As with almost any process, making it colder makes it slower. The word lager is derived from a German word that means “to store”. This likely originated from brewers in the olden days brewing lagers “stored” deep inside near-freezing caves.
While ales are routinely ready in a couple of weeks, a properly brewed true lager can take up to a month or more. However, there are various methods that can be employed to speed up the process.
Can I use a regular refrigerator to brew lager?
The same temperature regulators we reviewed above, for stand-alone freezers, can also be used with refrigerators. However, many experienced homebrewers prefer freezers because they are made to maintain the colder temperatures associated with lager.
What happens if I try to brew lagers the way I brew ale?
Lager yeast is bottom-fermenting and in order to produce a lager it must be fermented and matured at a cold temperature. If you use a lager yeast at an ale’s temperature range, you haven’t made a lager, you have made a hybrid beer.
Depending on the strain of lager yeast, it may taste great or terrible.
Can I build my own fermentation chiller?
Yes, many people build their own systems. Some require a little more know-how than others but there are numerous designs online to pick from. One example is an air-cooled box system that consists of insulated boxes, some form of ice, and a fan.


Leave a Reply